Installing adhesive or electrostatic window film can be done by the average person, as long as you're patient and meticulous. We offer a wide range of products, because there are so many different problems and types of glazing to be fitted. If you're in any doubt, don't hesitate to contact one of our advisors, who will point you in the direction of the most appropriate solution for your situation. Alternatively, you can request free samples to see the product in real life! Adhesive film has the advantage of being perfectly clear, and therefore very aesthetic. Anyone can apply adhesive film, as long as you're patient and meticulous. Like everything else, the first time is always the hardest. For large windows, we recommend two people: one to hold the film, the other to remove the protection and wet the glue.
Electrostatic window film is quite attractive, especially for those new to window film installation. It's great if you're worried about messing up the installation (you can start again) or if you want to remove the electrostatic film at the end of summer, to keep your glazing bare over winter. You can even store it and reuse it next warm season! Electrostatic window film has an average durability of two years. With thermal and mirror effect films, you'll be able to see without being seen. Discover our installation tutorial below, as well as a video tutorial to learn how to apply electrostatic film. If you have electrostatic window film, all is not lost! In fact, you can remove the film and start all over again at 0. On the other hand, an intensive cleaning session awaits you. You'll need to remove all dirt and dust from the glass, the glass surround and the electrostatic window film. Otherwise, bubbles will appear.
Adhesive window film is a little more complicated. If it's applied, it can't be reused once it's removed. If bubbles appear: Wait a few days. It's normal for bubbles to appear after applying adhesive film: it's the moisture under the film that comes out. If a small dot appears in a bubble, it's a sign of dust that hasn't been cleaned. In case of loose edges: Check that the adhesive is not running over the joint. This is the main cause of films peeling off prematurely. Simply cut the film back 1 to 2 millimeters before the joint to anticipate glass expansion. Then re-mould the film firmly to ensure adhesion. For tunnels: Wrap your squeegee in absorbent paper and scrape firmly from the inside out.
Ši skaidri arba raštuota plėvelė gali pakeisti jūsų langų išvaizdą ir pojūtį. Ją pagaminti išties nėra labai sunku, ir jei atliksite kelis paprastus veiksmus, galite turėti kažką gana gražaus. Šiame straipsnyje papasakosime, kas yra svarbiausia lango plėvelė ir aptarsime keletą priežasčių, kodėl tai taip gerai taupo energiją (ir atrodo puikiai).
Lipnios langų plėvelės klijavimas turi daug privalumų. Pirma, tai gali būti energijos taupymo veiksmas. Stiklas vibruoja kaip šiluma, kai pro jį šviečia saulė. Langų plėvelė atspindi šilumą, todėl vasarą jūsų namuose jaučiasi vėsiau. Tai leidžia mažiau naudoti oro kondicionierių, teoriškai sutaupant energijos sąskaitų. Antra, langų plėvelė yra investicija, skirta apsaugoti baldus ir kilimus. Saulės šviesa gali išblukinti spalvas. Įrengus langų plėvelę, galite sumažinti žalingą ultravioletinių spindulių, kurie išplauna jūsų daiktus, poveikį. Trečia, ji suteikia privatumo. Jei gyvenate judrioje vietoje, langų plėvelė gali užkirsti kelią kitiems matyti jūsų namų vidų. Iš tikrųjų yra tiek daug dizainų, kad greičiausiai rasite tokį, kuris atitiktų jūsų stilių. Kai kurie yra skaidrūs; kai kurie yra matiniai arba raštuoti. Tai leis jums suasmeninti savo erdvę.
Apdorota naudojant VSCO. Be to, langų plėvelės klijavimas ant langų yra pigus ir itin šaunus būdas pagerinti įprastų langų išvaizdą jų nekeičiant. Tai greitas ir paprastas „pasidaryk pats“ projektas, kurį galite pasigaminti vos per kelias valandas. Galiausiai, jei pabos nauja išvaizda, plėvelę galima nulupti nepažeidžiant stiklo. Kokybiška lipni langų plėvelė taip pat nėra labai priklausoma nuo kainos. Namų tobulinimo centrai yra gera vieta pradėti. Daugelyje šių parduotuvių yra įvairių langų plėvelių, o kai kurios siūlo išpardavimus ar kuponus. Taip pat galite pirkti internetu. Namų tobulinimui skirtose svetainėse dažnai yra daugiau pasirinkimų ir jos yra pigesnės. Taip pat galite apsvarstyti skirtingus prekių ženklus, peržiūrėti jų atsiliepimus ir pamatyti, kas geriausiai tinka jūsų poreikiams. Tik būtinai raskite plėvelę iš kokybiško gamintojo (pvz., Zhejiang Zhongbang), kuris yra patikimas ir priklauso žmonėms, kurie žino, kas yra kokybiška plėvelė. Kartais geriausią kainą siūlo gamintojas. Būtinai pasiteiraukite, ar jie turi didmeninės prekybos programą. O jei ketinate pirkti daug plėvelės iš karto, tai gali sutaupyti dar daugiau. Kai kurios internetinės parduotuvės taip pat nemokamai siunčia užsakymus, viršijančius tam tikrą sumą, ir tai yra patogus būdas sumažinti išlaidas. Prieš pirkdami būtinai peržiūrėkite plėvelės specifikacijas. Atkreipkite dėmesį į specifines UV apsaugos, šilumos mažinimo ir montavimo savybes. Dėl to galite lengvai pasirinkti geriausią produktą savo projektui.
Visada smagu tai daryti pačiam. Lipni langų plėvelė tai gali būti puikus projektas, bet, jei nesate atsargūs, labai keblus. Didžiausia problema paprastai kyla dėl apačioje esančių plėvelės burbulų. Niekam nepatinka sėdėti ir stebėti didelius, bjaurius burbulus ant stiklo! Prižiūrėkite savo langą vadovaudamiesi šiais paprastais patarimais, kad jis atrodytų elegantiškai ir profesionaliai: Surinkite reikiamas medžiagas. Jums reikės lipnios langų plėvelės, sausos šluostės ar skuduro, purškimo buteliuko su muiluotu vandeniu, valytuvo ar kortelės ir peilio. Nuvalykite stiklą šluoste, kad pašalintumėte dulkes ar nešvarumus. Tai padeda plėvelei prilipti ir neleidžia susidaryti burbulams. Kai stiklas bus švarus, išmatuokite jį ir iškirpkite plėvelę, kad ji tiktų, pridėdami maždaug po colį iš visų pusių. Apipurkškite stiklą muiluotu vandeniu. Tai leis plėvelei šiek tiek slysti, kad galėtumėte ją tiksliai sulygiuoti. Pirmojo žingsnio metu atsargiai nulupkite tik dalį dantytos langų plėvelės pagrindo. Uždėkite ją ant stiklo ten kur jai ir vieta. Likusią pagrindą palikite savo vietoje. Kai jį priglausite tinkamoje vietoje, po vieną nuimkite daugiau pagrindo, pirštais po truputį spausdami plėvelę žemyn. Jei matote, kad pradeda formuotis burbuliukai, viskas gerai! Atsargiai nubraukite gumytę (arba naudokite kreditinę kortelę), kad pašalintumėte burbuliukus nuo apačios į viršų. Lengvas muiluoto vandens papurkšimas padeda, bet nebūtina. Šiek tiek paspauskite (ir penkis pirštus į kiekvieną ranką) ir spauskite į plėvelę, vengdami jos tempimo ar plėšimo. Nupjaukite plėvelės perteklių universaliu peiliu. Dabar tiesiog atsisėskite ir grožėkitės savo darbu.
Lipni langų plėvelė limpa prie daugelio rūšių stiklo, tačiau pravartu turėti bent menkiausią supratimą, kur ji limpa, o kur ne. Šiame sąraše pateikti pagrindiniai stiklai dažniausiai naudojami langų plėvelėms gaminti: didelio atspindžio projektoriaus ekranas, iš vienos pusės dažytas titano dioksidu, padengtas titranuvis, reikalingas daugelio dizaino ir tipų langų plėvelių gaminių gamybai. Lengviausia dirbti su skaidriu stiklu, nes plėvelė prie jo geriausiai limpa ir galite matyti, ką darote. Matinis stiklas taip pat gali tikti. Jis turi tam tikrą tekstūrą, kuri leidžia jam sukibti su plėvele ir suteikia privatumo sluoksnį. Svarbu atkreipti dėmesį, kad nereikėtų klijuoti lipnios langų plėvelės ant dvigubo stiklo. Šis stiklas yra dvi sandarios plokštės. Aprūkęs stiklas gali tapti duobėtas, aprasoti arba pažeistas plėvelės. Plėvelę galima naudoti ir ant vieno stiklo. Taip pat galite vengti labai tekstūruotų ar nelygių stiklo paviršių, nes plėvelė tiesiog neprilips.
Prieš pradėdami projektą, apžiūrėkite jau turimą stiklą. Jei nesate tikri, kokio tipo stiklas yra įrenginyje, paklauskite suaugusiojo arba globėjo. Suaugęs asmuo arba globėjas gali padėti jums žinoti, kada jūsų langams tinka šis produktas, vadinamas lipnia langų plėvele. Kaip minėta anksčiau, yra daugybė žavių raštų ar dizainų, kuriuos galite gauti su lipnia langų plėvele! Vieni populiariausių yra matiniai raštai. Matinė langų plėvelė atrodo gražiai ir praleidžia šviesą, tuo pačiu išlaikydama privačias zonas. Ji ypač graži vonios kambariuose ar bet kurioje kitoje vietoje, kur nenorite, kad žmonės žiūrėtų. Geometriniai raštai taip pat populiarūs. Geometriniai raštai yra itin modernūs ir aktualūs namuose. Formos apima trikampius ar kvadratus, kai kurios netgi su juostelėmis, kurios jūsų namų languose atrodo įdomiai ir gražiai. Daugelis taip pat mėgsta gamtos tematikos dizainus. Tai gali būti gėlės, lapai ar medžiai, galintys įnešti lauko dvasią į vidų ir suteikti jūsų kambariui žaismingumo. Kai kurie lipni PVC plėvelė netgi paplūdimio ar kalnų vaizdus. Tai gali būti smagus užsiėmimas tiek viduje, tiek lauke! Vaiko kambariui rinkitės įmantrius dizainus, tokius kaip animaciniai filmukai, gyvūnai ar linksmi raštai. Šie raštai suteikia kambariui gyvumo ir žaismingumo. Jei norite kažko paprasto, tinka ir vienspalviai rinkiniai. Jie gali derėti prie jūsų kambario dekoro ir nėra pernelyg ryškūs. Smagu net maišyti ir derinti skirtingus stilius iš atskirų kambarių. Rinkdamiesi dizainą, pagalvokite apie estetiką, kurią norite pasiekti savo kambaryje. Tik būtinai pasirinkite kažką, kas jums patinka - tai kurį laiką bus ant jūsų lango.
Self-adhesive window filmsThe designs for d-c-fix self-adhesive window films range from a frosted glass look to fields of spring flowers. Decorative films can be used to quickly and easily embellish glass and window surfaces, set exciting accents, or create a stylish privacy screen. In order for the glass film to adhere perfectly, the window should be cleaned thoroughly beforehand. After cutting the glass film to the appropriate size (always leave a space of 2 mm from the silicone joint of the window frame), it can be applied. First, the surface to be covered must be sprayed with water or d-c-fix application fluid and the film must then be positioned gradually on the window.
Static window filmsWhether stripes, flowers or geometric shapes - d-c-fix statically adhesive windows films come in many different designs. The window films are applied with either water or d-c-fix application fluid, and are suitable for both decoration and privacy. In order for the glass film to adhere perfectly, the window should be cleaned thoroughly beforehand. After cutting the glass film to the appropriate size (always leave a space of 2 mm from the silicone joint of the window frame), it can be applied. First, the surface to be covered must be sprayed with water or d-c-fix application fluid then the carrier paper must be removed and the film positioned gradually on the window. How to reposition the static window film: The window film slipped during application and the image is now positioned crooked on the glass pane. No problem.
Functional window filmsDecorative patterns are not always selected for reasons of embellishment or privacy, but rather for functional aspects such as protection against heat, prying eyes or glass breakage. d-c-fix splinter protection filmIn order for the self-adhesive shatter protective film to adhere perfectly, the window should be cleaned thoroughly beforehand. After cutting the film to the appropriate size (always leave a space of 2 mm from the silicone joint of the window frame), it can be applied. First, the entire surface to be covered must be sprayed with water or d-c-fix application fluid and the film must then be positioned gradually on the window.

d-c-fix tinted film and d-c-fix sun protection film (statically adhesive)In order for the statically adhesive tinted film or statically adhesive sun protective film to adhere perfectly, the window should be cleaned thoroughly beforehand. After cutting the film to the appropriate size (always leave a space of 2 mm from the silicone joint of the window frame), it can be applied. First, the entire surface to be covered must be sprayed either with water or d-c-fix installation fluid, then the first backing film must be peeled off and the film positioned gradually on the window. Then spray the film with water again and squeeze out any water and air bubbles from underneath the film with the doctor blade.
Cleaning tipsd-c-fix window films can be wiped down easily with warm water and a drop of washing-up liquid or other commercially available, non-abrasive cleaning agents. Simple bubble removalSometimes air bubbles can become trapped under d-c-fix window films during the application process. The best way to remove bubbles is using a doctor blade. Simply squeeze out the bubbles, working from the center of the foil to the corners. As it does not use glue, static cling window film is renter-friendly, reusable, and ideal anywhere you want low-commitment privacy, glare control, or decoration.

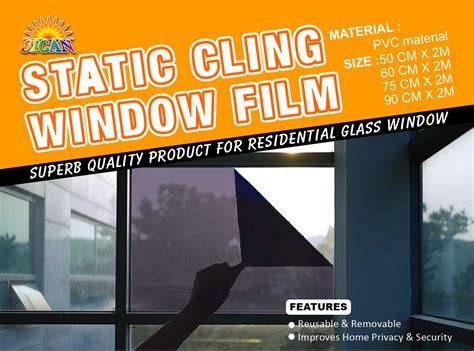
Purlfrost has specialised in window film since 2003 and is one of the UK’s leading window film suppliers and online retailers for privacy, decorative, and solar window films. Static cling is easier to reposition, remove, and reuse. Static cling window film is a non-adhesive PVC or vinyl film that uses static electricity and very close contact with the glass surface to stay in place. You wet the glass with a mild soapy solution, slide the film onto the surface, and squeegee out the water so the film lies flat. Because there is no glue, there is no cure time, no permanent bond, and no residue when you peel it off. Static cling film works best on flat, smooth, non-porous glass. The smoother the glass, the more of the film can touch it, and the stronger the cling.

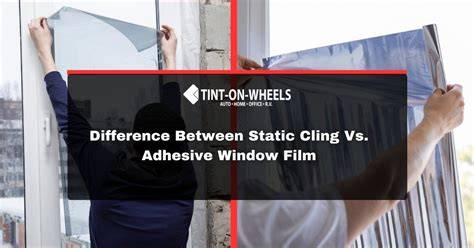
Static cling film uses static and water. You can slide it into position, lift and reposition it, and peel it away at any time. It leaves the glass in the same condition you found it. Self-adhesive film uses a glue backing that bonds more firmly to the glass. With curtains or blinds, you tend to choose between privacy and light. Closed curtains give privacy but block most daylight. If you want more privacy or a better-looking window without drilling, glue, or upsetting your landlord, static cling window film is very likely a good fit.
Static cling films shine on smooth interior glass when you want privacy and light, but also the freedom to change your mind later. Static cling window privacy film is not the best choice in every situation. Raised textures reduce the contact area between film and glass. This leads to weak grip, trapped air pockets, and edges that try to peel back. For serious heat rejection, glare control on large expanses of south-facing glass, or specialist applications (for example, commercial buildings where solar performance figures must be documented), purpose-designed self-adhesive solar films tend to be the better technical choice.
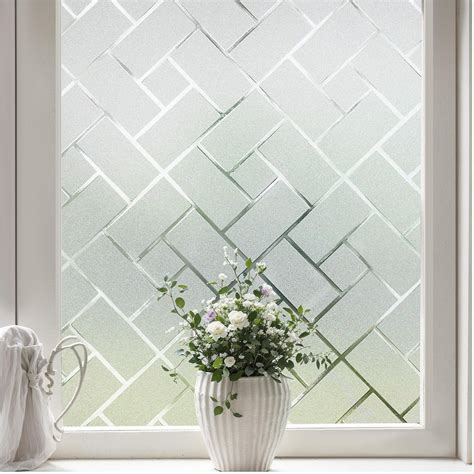
Static cling window film works by using static electricity to adhere to glass surfaces. Unlike adhesive films, it relies on a smooth and clean surface to stick effectively. It’s easy to apply, can be reused and reapplied, and comes in lots of different styles, including one-way privacy window film, blackout window film static cling, heat control window film static cling, and mirrored static cling window film. The key point is that no glue is involved. Static cling films use a non-adhesive PVC or vinyl that creates natural suction when pushed onto clean, non-porous glass. Water is part of the trick. A mild soapy solution lets the film float and slide while you position it. Once you squeegee the water and air out, the vinyl and glass sit almost flush with each other.
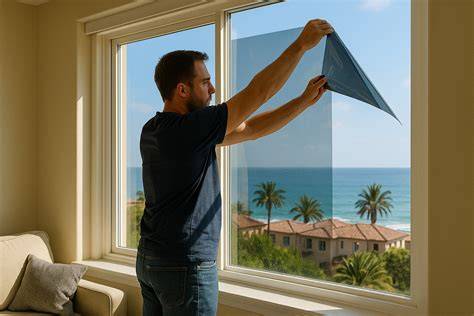
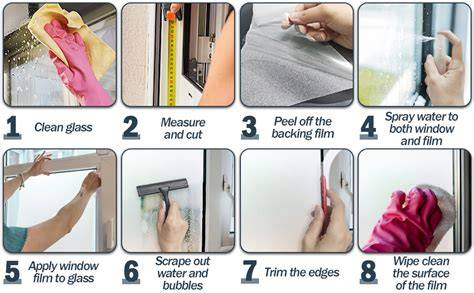
Decided on static cling? Static cling window film is one of the most forgiving DIY window upgrades you can do. It is easy to apply and remove, and you do not need a professional kit. Installing static cling window film is quick and straightforward. Steps: 1) Mix a slip solution in your spray bottle: clean water plus a few drops of mild, non moisturising dishwashing liquid. 2) Cut the film about 2 millimetres smaller than the glass, both in width and height. 3) A wetter surface gives you time to slide the film, flush out dust, and squeegee bubbles away. 4) Let the film float on the water layer and slide it into position. 5) Spray a light mist of water on the face of the film. Starting near the centre of the pane, use firm, overlapping strokes to push water and air toward the edges. When the pane looks smooth, step back and check it from outside or with a light behind it. Your film will settle over the first day. Slight haze or “milky” patches can appear as the last moisture evaporates. Do not slam or swing windows in this period. Even with care, real-life glass is rarely perfect.
Dust, curls from the roll, or a dry room can cause small issues. The good news is that static cling films are very forgiving. Check you still have a tiny gap between film and frame. Use your squeegee or wrapped card and push the bubble slowly toward the nearest edge. A handy trick is to shine a bright light through the window from the outside while you work. Surface type: Static cling films need smooth, non porous glass. Cleanliness: Any wax, polish, silicone spray, or old adhesive reduces grip. If in doubt, clean again with a mild detergent, rinse well, and dry. Backing sheet: Make sure the protective backing sheet is fully removed.

“Tape test” for coatings: Press a small piece of normal clear tape onto the glass. If even the tape fails to grip well, there may be a special coating or residue on the glass that reduces adhesion. Removing static cling window film feels much more like peeling off a sticker than scraping an old tint. Peel the film back slowly at a shallow angle, keeping it close to the glass. Static cling leaves no adhesive, so you do not need blades or solvents for residue. Yes. Re use is one of the main benefits of static cling technology. Static cling films are designed to be installed, removed, and re applied as long as you keep the cling side clean and free from deep creases.
Static cling window film is non adhesive and removable, so it does not damage smooth glass or leave residue behind when you peel it off. Static cling film is safe on most smooth, standard interior glass. Many static cling films provide UV protection and some level of heat control, especially tinted and reflective versions that cut solar gain and glare. Yes, static cling films work very well on smooth bathroom and kitchen windows as long as you install them on clean, dry glass. Static cling window film almost always goes on the inside surface of the glass. Static cling film needs smooth, clean glass and plenty of soapy water under the film during installation. Frosted static cling film lets light through but blurs detail on both sides, so you see vague shapes and brightness rather than a clear view.
The longevity of static cling window film depends on how long it’s exposed to sunlight, the humidity in the air, the quality of the window film, and how it’s applied and maintained. With proper care, static cling window film can last several years. Static cling window film gives you a simple way to upgrade your glass without drilling or glue. You can use static cling as a low-risk test before any permanent change. Want to know how frosted glass will feel in a bathroom, or how a reflective tint will affect a bright lounge? If you are ready for more private windows with less effort, browse Purlfrost’s range of high-quality static cling window films and pick the frosted, decorative, or solar control styles that match each room.